Optimizing container resources in Kubernetes (K8s) is essential for ensuring efficient workload performance while minimizing unnecessary costs. By properly configuring resource requests and limits, you can ensure your containers are neither over-provisioned nor starved for resources, which could lead to degraded performance or even crashes. In this article, we’ll walk through how to optimize CPU and memory resources for your containers, explore tools like the Vertical Pod Autoscaler (VPA) and Horizontal Pod Autoscaler (HPA), and provide insights on how to balance vertical and horizontal scaling for the best performance.
Understanding Resource Requests and Limits
Kubernetes uses two key concepts to manage resource allocation for containers: resource requests and resource limits.
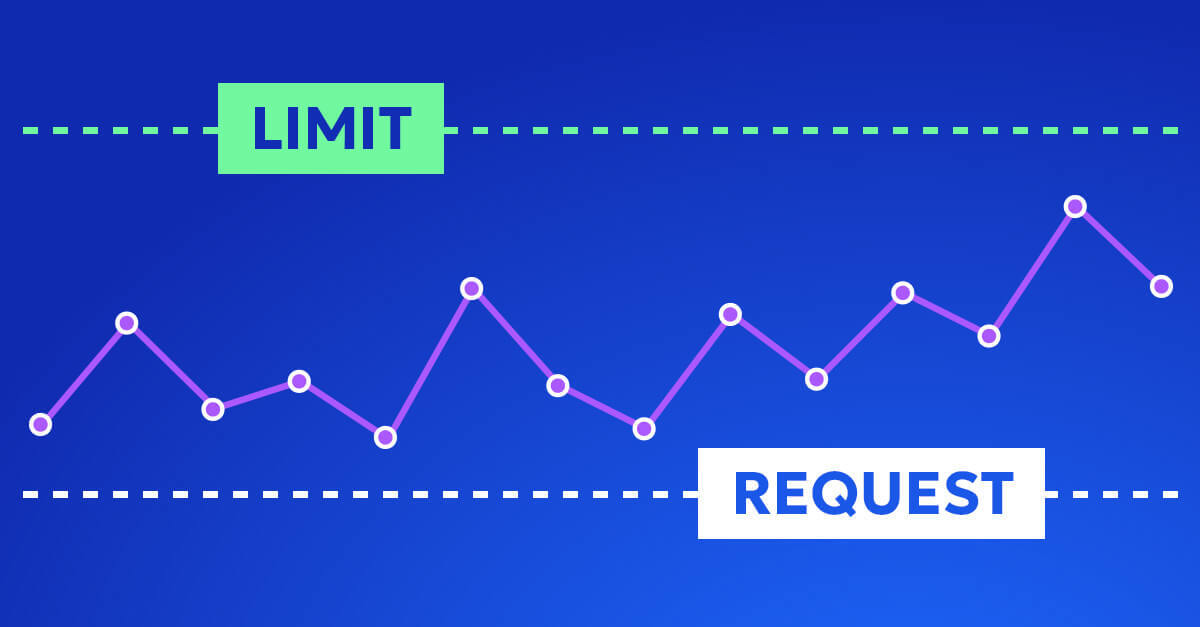
- Requests: This is the minimum amount of CPU or memory a container is guaranteed. Kubernetes uses these values to schedule pods on nodes that have enough available resources.
- Limits: This is the maximum amount of memory a container can use. If the container exceeds its memory limit, it will crash when it runs out of memory. Unlike CPU, memory cannot be throttled.
Optimizing these values ensures your applications have the right balance of resources. Setting them too high leads to wasted resources and higher costs, while setting them too low could lead to performance bottlenecks or application failure.
CPU vs. Memory: Key Considerations
CPU: A Shareable Resource
CPU is a compressible resource, meaning it can be shared among multiple containers. If a container requests less CPU than it needs, Kubernetes can throttle its CPU usage, allowing the container to continue running at a reduced capacity. This flexibility makes managing CPU less rigid, as containers can adjust based on load.
However, it is best practice not to set CPU limits. Setting CPU limits can lead to throttling, which degrades performance, especially in production environments where performance spikes can occur. Without CPU limits, containers can use more CPU resources during peaks, ensuring smoother operations while being throttled only by the available node capacity.
To optimize CPU usage:
- Set CPU requests that align with the minimum CPU your application needs to run efficiently.
- Avoid CPU limits to prevent unnecessary throttling and performance issues.
Memory: A Non-Compressible Resource
Memory, on the other hand, is a non-compressible resource. If a container exceeds its memory limit, Kubernetes cannot throttle the memory usage like it does with CPU. Instead, when the container hits its memory limit, the process running inside the container will fail, causing the container to die.
To optimize memory usage:
- Set memory requests based on the minimum amount of memory your container needs to operate efficiently.
- Set memory limits slightly higher to allow for flexibility in usage but low enough to prevent the container from consuming too much memory and crashing.
Be mindful of memory leaks—setting a memory limit can prevent a memory leak from consuming all available node memory, but it won’t prevent the container from dying when the limit is reached.
Manual vs. Automated Optimization
Optimizing CPU and memory resources can be done either manually or with automated tools. Let’s explore both options:
Manual Optimization: Iterations Based on Monitoring
A manual approach involves monitoring CPU and memory usage over time and adjusting resource requests and limits accordingly. Tools like Prometheus and Grafana can provide detailed metrics on resource utilization, helping you identify containers that are over or under-provisioned.
The manual process includes:
- Monitoring resource usage over time.
- Analyzing trends to identify containers that are frequently throttled (indicating too little CPU) or approaching memory limits (indicating too little memory).
- Adjusting requests and limits for those containers and repeating the process in iterative cycles.
While this method gives you detailed control, it can be time-consuming and requires ongoing adjustments as workloads change.
Automated Optimization: Leverage the Vertical Pod Autoscaler (VPA)
For a more automated approach, Kubernetes’ Vertical Pod Autoscaler (VPA) automatically adjusts resource requests and limits based on real-time resource usage. VPA continuously monitors your containers and determines whether they are under or over-provisioned.
- Under-utilized resources: If VPA detects that a container is using far less CPU or memory than requested, it will reduce the resource requests, freeing up resources for other containers.
- Over-utilized resources: If a container frequently hits its memory limits, VPA will increase its resource requests, ensuring the container has enough resources to run efficiently.
However, VPA comes with an important limitation: it cannot run in parallel with the Horizontal Pod Autoscaler (HPA). This presents a challenge for companies needing to scale both vertically (adjusting resource allocation per pod) and horizontally (adjusting the number of pod replicas).
VPA and HPA: Why They Can’t Run in Parallel and How to Find the Sweet Spot
VPA and HPA cannot operate simultaneously on the same set of pods due to conflicting scaling mechanisms:
- VPA adjusts the CPU and memory requests for each pod, optimizing vertical scaling based on actual resource usage.
- HPA adjusts the number of pod replicas based on metrics such as CPU, memory, or custom application metrics.
If both VPA and HPA were to run simultaneously, VPA’s dynamic adjustments to resource requests could mislead HPA into thinking more resources are available, preventing HPA from scaling out additional pods when necessary. Conversely, HPA might add unnecessary pods when the better solution would be to vertically increase resources in existing pods.
Solutions for Optimizing Between VPA and HPA
Although VPA and HPA cannot run together, you can still find the sweet spot between vertical and horizontal scaling through the following strategies:
- Use HPA for Stateless Applications and VPA for Stateful Applications:
- Stateless applications, such as web servers and APIs, benefit from horizontal scaling using HPA. These workloads can easily handle spikes by distributing the load across more pods.
- Stateful applications, such as databases, often require vertical scaling using VPA to ensure resource-intensive workloads are adequately supported.
- Leverage HPA with Conservative Resource Requests: Start by setting conservative CPU and memory requests, allowing HPA to scale out efficiently. By slightly under-committing resources, HPA can quickly add or remove pods without over-provisioning or performance degradation.
- Manual Vertical Scaling with HPA for Critical Workloads: You can manually adjust vertical resource allocations while using HPA for horizontal scaling. This approach gives you fine control over resources while HPA manages dynamic scaling based on traffic.
- Stagger the Use of VPA and HPA: For workloads requiring both vertical and horizontal scaling, you can stagger the use of VPA and HPA. For instance, you can run VPA during periods of low demand to optimize resource requests, then disable VPA and switch to HPA during peak traffic times.
- Consider Third-Party Solutions: Some third-party tools offer enhanced multidimensional scaling (both vertical and horizontal). Solutions like KEDA (Kubernetes Event-Driven Autoscaler) or Cluster Autoscaler enable more sophisticated scaling strategies, allowing you to balance resource utilization across different axes.
Best Practices for Resource Optimization
- Avoid CPU limits: While CPU requests are necessary, avoid setting CPU limits to prevent unnecessary throttling and performance degradation.
- Set requests and limits based on real-world usage: Use monitoring tools or VPA to gather real-world data and avoid guessing when configuring resources.
- Keep memory limits conservative: Since memory is non-compressible, always set limits to prevent over-consumption and potential crashes.
- Regularly monitor and adjust: Even if you’re using VPA, continue reviewing metrics to ensure your workloads are running efficiently, adapting resource allocations as necessary.
Do You Want to Optimize Your Cluster in a More Efficient Way?
If you’re looking to take your Kubernetes optimization to the next level, Zesty can help you optimize your cloud infrastructure management. Our solution automates cloud cost optimization while improving performance, helping you make the most of your cloud resources.
Get in touch with us today to learn more about how Zesty can help you optimize your Kubernetes cluster and save on cloud costs.


