Scaling Kubernetes infrastructure efficiently is one of the biggest challenges DevOps teams face. You don’t want to overprovision and waste money on idle resources, but underprovisioning can bring your apps to a grinding halt.
That’s where EKS Cluster Autoscaler (CA) automatically adds or removes nodes to match the demands of your workloads. But to get the most out of it, you need to understand how it works, configure it correctly, and optimize it for cost savings.
Let’s dive deep into how the EKS Cluster Autoscaler works, best practices for tuning it, and how it plays a key role in cloud cost optimization.
How Cluster Autoscaler Works
What Is the Cluster Autoscaler?
Cluster Autoscaler (CA) is an open-source Kubernetes component that automatically scales the number of nodes in your EKS cluster based on pending pods. Unlike the Horizontal Pod Autoscaler (HPA), which scales individual pods, CA focuses on scaling the infrastructure itself.
Think of it as a Kubernetes-native scaling brain that:
- Adds nodes when there are pending pods with unsatisfied resource requests.
- Removes nodes when they are underutilized and can be safely drained.
- Balances workloads efficiently to avoid resource fragmentation.
How Does Cluster Autoscaler Decide to Add Nodes?
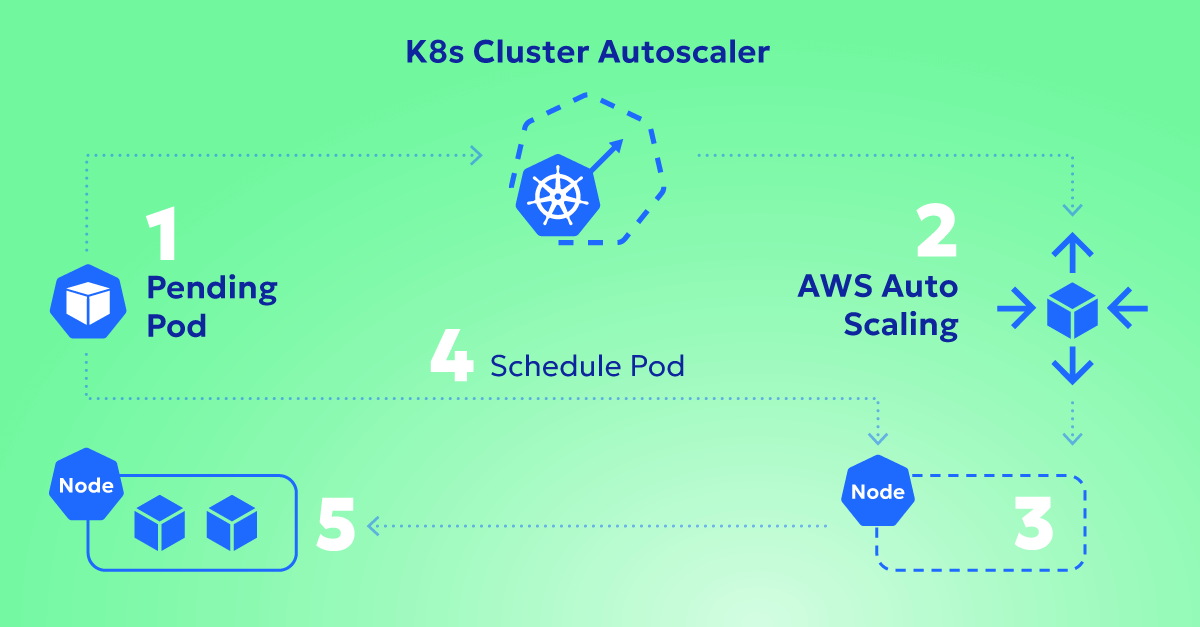
Let’s say you deploy an application, but there aren’t enough resources available on your existing nodes. The new pods stay in a Pending state because they can’t be scheduled.
Here’s how CA reacts:
- It detects pending pods that can’t be scheduled due to resource constraints.
- It evaluates existing node groups to see if increasing capacity would help.
- It requests new nodes from AWS (using EC2 Auto Scaling Groups or Managed Node Groups).
- New nodes join the cluster, and Kubernetes schedules the pending pods onto them.
Example Scenario:
Your cluster runs two m5.large nodes, each with 2 vCPUs and 8 GiB of RAM. You deploy a workload requiring 4 vCPUs and 16 GiB of RAM, but no existing node has enough capacity.
CA sees this and attempts to scale by adding a node from the available instance types in the ASG, such as an m5.2xlarge, if it has been configured as an option.
How Does Cluster Autoscaler Decide to Remove Nodes?
CA isn’t just about adding nodes—it also looks for opportunities to remove unneeded nodes to save costs.
Here’s how it decides when to remove a node:
- Identifies underutilized nodes where no critical workloads are running.
- Considers Pod Disruption Budgets (PDBs) and eviction policies before draining a node.
- Evicts non-essential pods from those nodes and reschedules them elsewhere.
- If the node is empty, it removes it from the cluster to cut costs.
Example Scenario:
You scaled up to 10 nodes during peak traffic, but now it’s midnight, and demand has dropped. CA finds that 3 nodes are mostly idle and safely removes them.
Result: Your cluster automatically scales down, saving money while keeping services running smoothly.
Best Practices for Optimizing Autoscaling
Cluster Autoscaler is powerful, but misconfigurations can lead to inefficient scaling, high costs, or performance issues. Here’s how to fine-tune it:
1. Set the Right Resource Requests for Your Pods
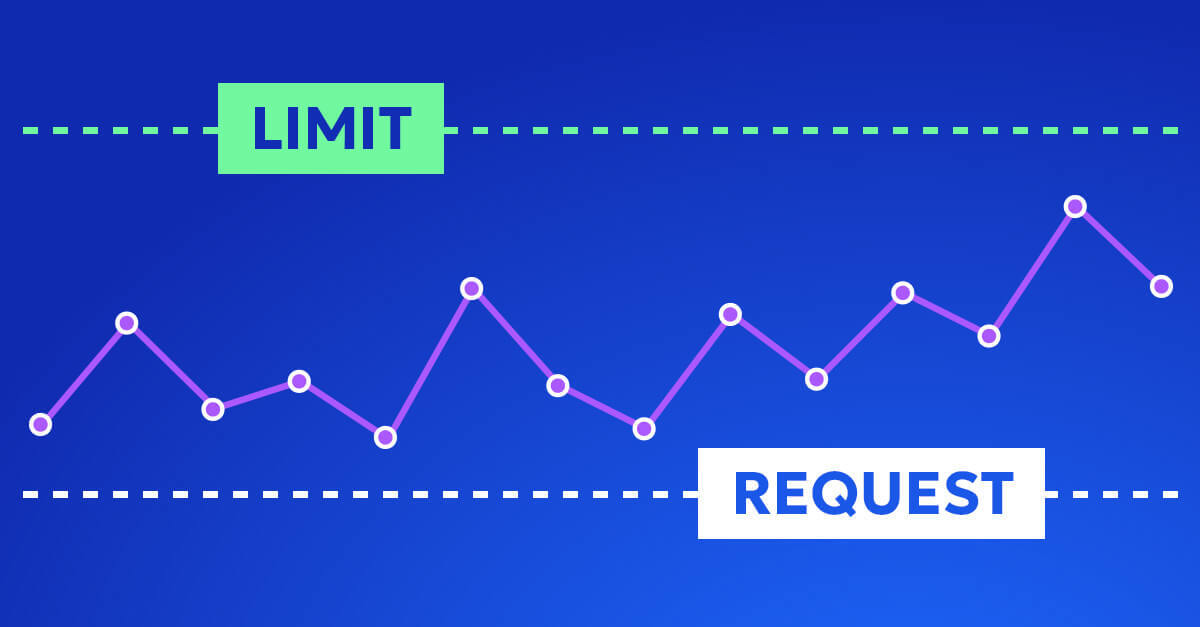
CA scales based on pod requests (not limits). If your pods don’t specify CPU and memory requests, CA won’t know how many nodes are needed
Example: Correct Pod Resource Requests
  resources:
  requests:
    cpu: "500m"
    memory: "256Mi"
What happens if I don’t set resource requests?
- CA underestimates if requests are too low → Pods might not get enough resources.
- CA overestimates if requests are too high → You might overpay for unused capacity.
2. Use Multiple Node Groups for Flexibility
Instead of a single instance type, create multiple node groups with different sizes (e.g., small, medium, and large nodes). This gives CA more options to pick the best instance.
Example: Mixed Node Groups in an EKS Cluster
m5.large(General-purpose, 2 vCPUs, 8 GiB RAM)c5.large(Compute-optimized, 2 vCPUs, 4 GiB RAM)r5.large(Memory-optimized, 2 vCPUs, 16 GiB RAM)
Why It Matters?
- Prevents fragmentation (e.g., scheduling small pods on large nodes).
- Reduces costs by using the most efficient instance type per workload.
3. Set scale-down-delay-after-add to Avoid Over-Scaling
By default, CA waits 10 minutes before removing an unused node. Adjusting this can fine-tune scaling behavior.
Example: Changing Scale-Down Delay
scale-down-delay-after-add: 5m
Why? This prevents flapping (where nodes are added and removed too quickly).
The Role of Cluster Autoscaler in Cloud Cost Optimization
CA isn’t just about performance—it’s a key tool for cutting AWS costs. Here’s how:
1. Reducing Overprovisioning
Many teams oversize clusters to handle peak traffic. Instead, CA lets you scale on-demand and only pay for what you use.
Learn how Zesty automatically reduces minimum replicas and delivers 5X faster application boot time to handle traffic spikes safely.
2. Automated Scale-Down for Idle Nodes
Unused nodes are a silent budget killer. CA finds them and shuts them down automatically.
3. Intelligent Spot Instance Optimization
By automatically selecting Spot Instances when available, CA helps save up to 90% on EC2 costs.
Discover how Zesty safeguards workloads against Spot interruptions with automated node replacement in under 40 seconds.
4. Right-Sizing Nodes to Fit Workloads
Instead of running huge instances with wasted resources, CA finds the best match for each workload.
Example:
Instead of running 10x m5.2xlarge instances all day, CA dynamically scales between:
m5.largeduring low trafficm5.2xlargeduring high traffic
End result? You only pay for what you actually use.
How to set up the EKS auto scaler step-by-step guide
Key Takeaways
EKS Cluster Autoscaler is a powerful automation tool, but only when configured correctly.
- Understand how CA scales up and down to prevent overprovisioning.
- Fine-tune requests and node groups to optimize scheduling.
- Leverage Spot Instances to cut cloud costs.
- Monitor scale-down behavior to ensure efficient node cleanup.


