If you’re running applications in Kubernetes, you’ve likely experienced the frustration of slow pod boot times. When traffic surges and scaling is critical, those seconds—or even minutes—of waiting for new pods to start can feel like an eternity. Slow pod initialization doesn’t just harm user experience; it can lead to downtime, inflated costs, and lost revenue.
The good news? There are ways to dramatically improve pod boot times. In this guide, we’ll explore six advanced techniques to address these delays. Alongside explaining each technique, we’ll also dive into their downsides and offer cost-friendly alternatives to help you balance speed and efficiency.
1. Maintain Sufficient Node Headroom in Your Cluster
How Node Headroom Helps
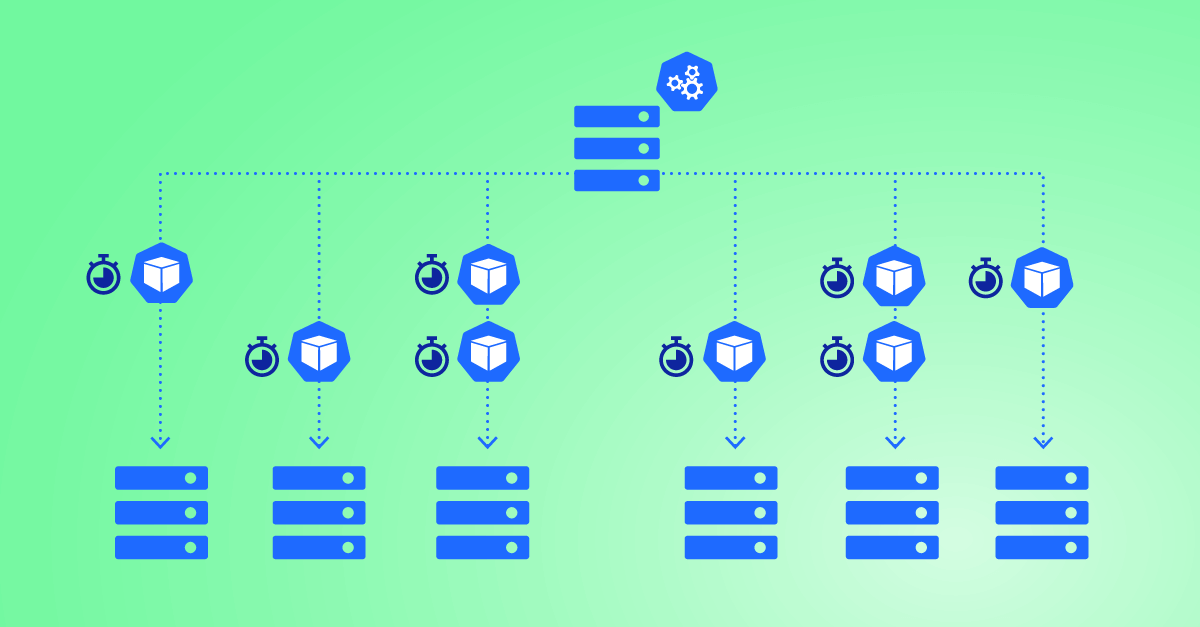
One of the simplest yet most effective ways to reduce pod boot times is to maintain sufficient node headroom in your cluster. By ensuring there’s always a buffer of unused resources, you can guarantee that new pods have a place to start immediately without waiting for new nodes to be provisioned.
Node headroom works as a safeguard against capacity issues. If your cluster is running at full capacity and additional pods need to be scheduled, Kubernetes will trigger autoscaling to add new nodes. However, this provisioning process can take minutes, delaying pod startup and impacting application performance during traffic spikes. Maintaining headroom eliminates this delay by ensuring resources are always available.
How to Set It Up
Set Resource Requests and Limits: Configure appropriate CPU and memory requests for your pods to ensure Kubernetes can calculate and reserve the right amount of resources.
Use the Cluster Autoscaler: Enable the Cluster Autoscaler to maintain a buffer of unused nodes. For example, configure a minimum node pool size to ensure headroom during low traffic:
apiVersion: autoscaling/v1 kind: ClusterAutoscaler spec: minNodes: 3 maxNodes: 10
Monitor Resource Utilization: Use monitoring tools like Prometheus and Grafana to track node utilization and adjust headroom as needed to balance performance and cost.
Downsides
- Overprovisioning Risks: Keeping a buffer of unused resources can lead to overprovisioning, where you pay for idle capacity that is not actively used.
- Cost Inefficiency: Large headroom buffers may significantly increase your Kubernetes bill, especially in cloud environments where nodes are charged on-demand.
Cost-Friendly Alternative: HiberScale Technology
Maintaining headroom doesn’t have to mean paying for unused capacity. Zesty Kompass offers a revolutionary solution with its HiberScale technology, which dynamically hibernates unused nodes and reactivates them within 30 seconds whenever capacity is needed.
This approach ensures you always have headroom for new pods without incurring the costs of idle resources. By leveraging HiberScale, you can eliminate pre-startup delays while optimizing your cluster for cost efficiency.
2. Optimize Container Image Size with Multistage Builds and Minimal Base Images
Oversized container images can significantly delay pod boot times. Kubernetes must download the image from the container registry and load it onto a node. Larger images take longer to pull, increasing pod initialization time. By optimizing your container images, you can make this process much faster.
For compiled languages like Go, you can achieve even lighter and more secure images by using the “scratch” base image. This approach not only reduces image size but also minimizes potential attack vectors due to the absence of unnecessary components.
How This Helps
Oversized container images can significantly delay pod boot times. Kubernetes must download the image from the container registry and load it onto a node. Larger images take longer to pull, increasing pod initialization time. By optimizing your container images, you can make this process much faster.
How to Set It Up
Use Multistage Builds: Separate build dependencies from runtime environments in your Dockerfile to create smaller, production-ready images. Example:
  # Stage 1: Build the binary FROM golang:1.16 AS builder WORKDIR /app COPY . . RUN go build -o myapp
# Stage 2: Minimal runtime image FROM alpine:3.14 WORKDIR /app COPY --from=builder /app/myapp /app/myapp ENTRYPOINT ["/app/myapp"]
Use Lightweight Base Images: Replace full OS images (e.g., Ubuntu) with lightweight alternatives like Alpine or Distroless to reduce image size without sacrificing functionality.
Automate Optimization: Use tools like Docker Slim to automate the process of reducing your container image size. These tools remove unnecessary layers, libraries, and dependencies.
Downsides
- Development Overhead: Multistage builds and lightweight images require careful setup and testing to avoid breaking dependencies.
- Debugging Challenges: Minimal images may lack debugging tools, making it harder to troubleshoot issues in production.
Cost-Friendly Alternatives
- Reserve optimization for production environments, using full-featured images in development for easier debugging.
- Use balanced images like Debian Slim, which offer reduced size without sacrificing usability.
3. Use a Local Container Registry Mirror
How a Local Mirror Helps
Instead of pre-pulling images onto each node, which can lead to storage issues and inefficient use of resources, setting up a local container registry mirror like Harbor within your cluster can significantly speed up image pulls. This approach reduces external bandwidth usage, improves pull speeds, and provides better control over image distribution.
How to Set It Up
Deploy Harbor in Your Cluster:Use Helm to deploy Harbor, a popular open-source registry solution. Example:
helm repo add harbor <https://helm.goharbor.io> helm install my-harbor harbor/harbor
Configure Nodes to Use the Local Mirror:Update the container runtime configuration on each node to use the local Harbor instance as a mirror. For Docker, modify the daemon.json file: { "registry-mirrors": ["<https://harbor.your-domain.com>"] }
Implement Image Caching Policies:Set up caching rules in Harbor to automatically pull and cache frequently used images from external registries.
Downsides
- Additional Infrastructure: Requires setting up and maintaining an additional service within your cluster.
- Initial Setup Complexity: Configuring Harbor and updating node configurations can be complex for teams new to registry management.
Cost-Friendly Alternatives
- Use Cloud Provider Registry Services:Leverage managed container registry services offered by cloud providers, which often have built-in caching and replication features.
- Optimize Image Pull Strategies:Implement intelligent pull strategies in your deployments, such as using the
imagePullPolicy: IfNotPresentoption to reduce unnecessary pulls. - Implement a Caching Proxy:Use a caching proxy like Sonatype Nexus or JFrog Artifactory, which can cache container images without the full complexity of a registry mirror.
4. Choose High-Speed Storage Solutions for Persistent Volumes
How High-Speed Storage Helps
Applications requiring persistent storage can experience significant delays if the storage backend is slow. High-performance storage solutions, such as SSD-backed volumes, ensure faster I/O, reducing pod startup times for applications with heavy data dependencies, like databases or data analytics pipelines.
How to Set It Up
Configure SSD-Optimized Storage Classes: Use storage classes provided by your cloud provider for high-speed SSD-backed volumes. Example for AWS:
apiVersion: storage.k8s.io/v1 kind: StorageClass metadata: name: fast-ssd provisioner: kubernetes.io/aws-ebs parameters: type: gp3 iops: "3000" throughput: "125"
Use Shared ReadWriteMany (RWX) Volumes: For workloads requiring shared access to data, such as a web application with multiple replicas, use RWX volumes like AWS EFS. Example configuration:
apiVersion: storage.k8s.io/v1 kind: PersistentVolume metadata: name: shared-volume spec: capacity: storage: 10Gi accessModes: - ReadWriteMany nfs: path: /data server: <EFS-server-endpoint>
Pre-Cache Data Using Init Containers: Use init containers to load frequently accessed data into local node storage or an in-memory cache, reducing reliance on external persistent storage during startup.
Downsides
- Higher Costs: SSD-backed storage is more expensive than standard HDD-based options.
- Overprovisioning: Assigning high-speed storage to non-critical workloads can result in wasted resources.
Cost-Friendly Alternatives
- Tiered Storage: Assign SSD-backed storage only to critical workloads while using standard storage for less demanding tasks.
- In-Memory Caching: Use tools like Redis or Memcached to cache frequently accessed data, reducing dependence on persistent storage.
- Optimize Storage Requests: Carefully size your storage requests to ensure you’re not overprovisioning expensive resources.
Sign up for our weekly newsletter and get the latest FinOps expert strategies.
Build a Kubernetes Environment That’s Fast and Efficient
Optimizing pod boot times is a critical step in ensuring your Kubernetes clusters are resilient, responsive, and cost-effective. Slow pod initialization can disrupt user experience, cause downtime, and inflate costs—but with the right strategies, you can overcome these challenges and build a high-performing environment.
Each of the techniques covered in this guide not only improve performance but also help strike a balance between speed and cost. While some solutions may introduce trade-offs, such as higher setup complexity or additional infrastructure requirements, they ultimately enable you to create a Kubernetes environment that scales efficiently while minimizing waste.
Start by analyzing your cluster’s specific needs and bottlenecks. Implement these techniques incrementally, monitor the results, and refine your approach as needed. With thoughtful planning and the right tools, you can ensure that your Kubernetes clusters are ready to meet the demands of modern, scalable applications.

