As more teams adopt Kubernetes to orchestrate their containerized applications, they’re discovering an uncomfortable truth: while Kubernetes excels at abstracting infrastructure complexity, it doesn’t reduce cost. If anything, it can make cloud spending even harder to understand—and control.
It’s not uncommon to see companies rack up tens of thousands of dollars in unnecessary spend due to fx. idle nodes, over-provisioned resources and inefficient autoscaling configurations.
In this guide, we’ll walk you through:
- The foundations of Kubernetes cost optimization, including setting pod requests and limits, autoscaling, and Spot Instances.
- A deep dive into the best tools for Kubernetes cost optimization, analyzing how each solution extends and automates these core strategies.
The Fundamentals of Cost Optimization in Kubernetes
Before evaluating tools, it’s important to understand the levers you can pull to reduce Kubernetes costs natively, using built-in features and best practices. These include strategies like right-sizing workloads, optimizing node pools, and leveraging autoscaling efficiently.
Later in this guide, we’ll review cost optimization tools that help you apply, automate, and enhance these native strategies—so you can get even more out of Kubernetes’ built-in capabilities and keep your cloud spend under control.
1. Right-Sizing Resources
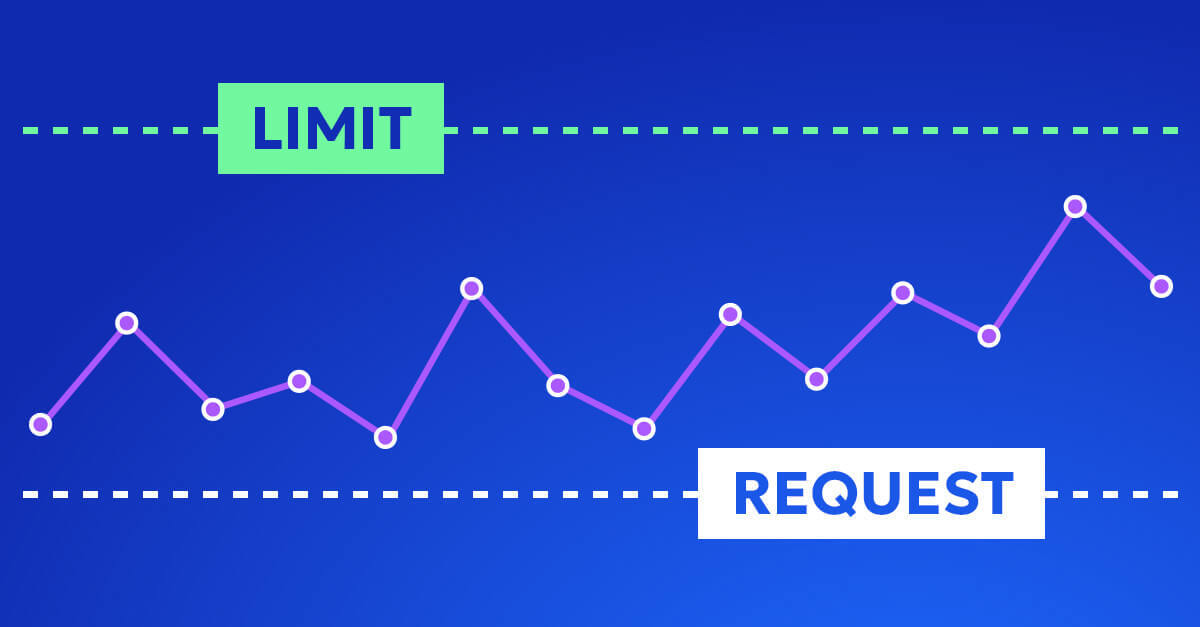
In Kubernetes, each pod can (and should) define resource requests and limits for CPU and memory. These settings tell the scheduler how much of the cluster’s capacity a pod needs—and how much it can be allowed to consume.
But here’s the problem:
If you over-provision, Kubernetes reserves more than necessary. That leads to:
- Underutilized nodes, because pods take up space they don’t use.
- Wasted compute
- Higher cloud bills, since you’re paying for idle resources.
If you under-provision, you risk:
- OOM (Out of Memory) kills if a pod exceeds its memory limit.
- CPU throttling, which slows down your app.
- Unstable services—especially during load spikes.
How to Right-Size Properly
- Start with historical metrics Use Prometheus, Datadog, or tools like Goldilocks to analyze actual CPU and memory usage over time.
- Set realistic
requestsRequests define the guaranteed amount of resources your pod gets. Set these close to the average usage, not the peak. This helps the scheduler place pods efficiently and improves overall cluster density. - Set higher
limitsonly if needed Limits cap the maximum resources a pod can use. They seem like a safety net, but there’s a tradeoff:- CPU limits can throttle workloads, even if the node has spare CPU capacity.
- Memory limits are stricter — if a pod exceeds them, it’s killed (OOMKilled).
- Best practice: 👉 Set memory limits to avoid runaway memory usage 👉 Avoid setting CPU limits unless absolutely necessary Why? Because pods without CPU limits can burst and use all available CPU on the node, improving performance without hurting stability — as long as requests are set properly. But if you set CPU limits too low, you risk throttling the pod during peak demand, hurting performance.
- Revisit regularly Resource needs change. What was optimal last quarter may now be wasting money or causing instability. Set a process to review and adjust requests/limits monthly or quarterly.
2. Autoscaling with Karpenter
While Kubernetes includes the Cluster Autoscaler and Horizontal Pod Autoscaler (HPA), these tools operate on different layers—and not always efficiently. Karpenter, AWS’s open-source autoscaler, is designed to replace Cluster Autoscaler, offering faster and more intelligent node provisioning.
Why use Karpenter instead:
- Launches right-sized EC2 nodes in 30-60 seconds.
- Selects the most cost-effective instance types automatically.
- Continuously replaces underutilized nodes to reduce waste.
Note: Karpenter does not replace HPA. You can (and should) use HPA alongside Karpenter to handle pod-level scaling based on CPU, memory, or custom metrics.
3. Leveraging Spot Instances for Kubernetes workloads
AWS Spot Instances can offer up to 90% savings compared to On-Demand pricing, making them incredibly attractive for cost-conscious Kubernetes environments. But they come with one big tradeoff: they can be interrupted with just 2 minutes’ notice.
That makes Spot ideal for stateless, fault-tolerant, and short-lived workloads—but risky for critical services unless you build the right safety nets.
How to make Spot work in Kubernetes:
- Use taints and tolerations to run only interruptible workloads (like batch jobs, CI/CD pipelines, or background tasks) on Spot nodes.
- Deploy Karpenter or Cluster Autoscaler with Spot capacity pools to automatically replace interrupted instances.
- Use multiple instance types and Availability Zones to reduce the chance of simultaneous Spot revocations.
- Implement Pod Disruption Budgets (PDBs) to avoid too many pod evictions at once when a Spot node disappears.
Use cases for Spot Instances in K8s:
- Image rendering jobs
- Video processing
- Data ingestion pipelines
- Test environments
- Event-driven workers
4. Node Pool Optimization
In Kubernetes, every node is part of a node pool—a logical grouping of nodes with similar characteristics. There’s no such thing as a standalone node, so the real optimization challenge lies in how you define and manage those pools and how you schedule workloads across them.
💡 Think of node pools as your “infrastructure buckets.” Each pool can be made up of different instance types, pricing models (e.g., On-Demand, Spot, Reserved), or performance profiles. The more intentionally you design them, the more you can squeeze out of your infrastructure spend.
When you match workloads to the right type of node pool, you:
- Enable smarter pod placement, reducing resource fragmentation and bin-packing issues.
- Achieve higher utilization by avoiding mismatched workloads hogging resources they don’t need.
- Boost cost-efficiency by running each workload on infrastructure that fits its actual resource profile (not the “just in case” overkill setup).
Common Node Pool Strategies:
- Workload-by-Profile Pools
- Create pools for compute-intensive, memory-intensive, and general-purpose workloads.
- Example:
- CPU-heavy workloads →
c6a.large - Memory-heavy workloads →
r6i.large - Mixed or default workloads →
m6a.large
- CPU-heavy workloads →
- Pricing Model Pools
- Separate On-Demand, Spot, and Reserved nodes into their own pools.
- Use taints, tolerations, or affinity rules to ensure only appropriate workloads run on Spot nodes.
- Availability Zone Pools
- Spread node pools across multiple AZs to increase resilience.
- Important for HA services or multi-AZ applications.
- Compliance or Isolation Pools
- Use dedicated node pools for workloads that require compliance isolation (e.g., customer data, secure services).
How to Implement Smart Scheduling Across Pools:
- Use node labels, node selectors, or affinity/anti-affinity rules to steer workloads to the appropriate pool.
- Apply taints and tolerations to restrict critical or sensitive workloads to high-performance or isolated nodes.
- Pair with autoscalers (like Karpenter or Cluster Autoscaler) to dynamically scale the right pool based on demand.
5. Optimizing Container Image Size
Container image size may seem like a minor detail—but in a Kubernetes cluster running at scale, bloated images can silently eat away at your performance and budget.
Large container images:
- Slow down pod start times, especially during rolling updates or node autoscaling, as every image must be pulled from the registry.
- Increase network egress costs, especially if you’re pulling images across zones or from public registries.
- Waste disk space and I/O, especially on nodes with ephemeral storage or when running many containers in parallel.
- Make cold starts painful, especially for serverless-style workloads or jobs that spin up frequently.
How to Optimize Image Size
- Use Minimal Base Images
- Switch from heavy base images like
ubuntuordebianto lightweight alternatives likealpineordistroless. - Example: Replace
node:18withnode:18-alpinewhere possible.
- Switch from heavy base images like
- Multi-Stage Builds
- Use multi-stage Docker builds to separate build-time dependencies from runtime.
- Only copy the final binary or needed assets into the final image, leaving behind compilers and tools.
- Remove Unused Packages
- Audit your Dockerfile and eliminate packages or tools that aren’t needed at runtime.
- Clean up caches with
apt-get cleanandrm -rf /var/lib/apt/lists/*to shrink the image further.
- Pin Versions and Prune Layers
- Avoid pulling latest versions blindly—pin exact versions to avoid surprises.
- Combine
RUNinstructions to reduce image layers and size.
- Scan and Compress
- Use tools like
docker-slimorbuildkitto compress and strip unnecessary metadata and files. - Regularly scan images for vulnerabilities and remove outdated or bloated layers.
- Use tools like
6. Persistent Volume and Storage Optimization
Persistent Volumes (PVs) are easy to overlook — but they can quietly drain your budget if left unmanaged. When a pod is deleted, its attached volume doesn’t always go with it. Multiply that across staging environments, CI/CD pipelines, or failed workloads, and you’ll end up with dozens of orphaned volumes racking up charges.
Beyond orphaned volumes, there are other silent storage drains:
- Snapshot sprawl: Frequent, unmanaged snapshots (especially for EBS or GCE volumes) add up over time.
- Over-provisioned volumes: Many teams default to gp2/gp3 SSDs sized far larger than needed. It is highly recommended if you are not already using gp3 to switch. gp3 is better than gp2 in every possible way in terms of:
- Lower cost per GB
- Higher baseline performance
- More control over IOPS and throughput
- Inefficient reclaim policies: A
Retainreclaim policy on temporary volumes can block auto-cleanup. - Low-utilization volumes: You may be paying for 100 GiB SSDs when only 5 GiB is used consistently.
Methods to optimize storage
- Run regular audits: Use
kubectl get pvandkubectl describe pvcto list volumes and check their status, capacity, and reclaim policy. - Check for
ReleasedPVs: These are often unattached and ready for cleanup. - Adjust reclaim policies: For ephemeral workloads, use
Deleteinstead ofRetainto ensure volumes get removed with the pod. - Set alerts for low-utilization volumes: Cross-reference requested storage with actual disk usage (from tools like Prometheus or CSI metrics).
- Clean up old snapshots: Use lifecycle policies in AWS or GCP to expire outdated backups automatically.
7. Network Efficiency
Networking is one of the most overlooked cost drivers in Kubernetes — especially in cloud environments where data transfer costs between Availability Zones (AZs) or regions can spike quickly. On top of that, overly chatty microservices, verbose protocols, or poorly tuned sidecars increase both latency and spend.
These networking costs don’t always show up in Kubernetes metrics. They quietly pile up on your cloud bill under vague line items like “Inter-AZ data transfer” or “Load Balancer Data Processed.”
Why network costs can add up
- Cross-AZ traffic in AWS can cost $0.01–$0.02 per GB, depending on volume. Multiply that across multiple services and days — and it adds up.
- Uncompressed, verbose protocols like REST over HTTP can lead to higher payload sizes and network load.
- Service meshes (like Istio) may double traffic between pods due to sidecar overhead, especially with mutual TLS (mTLS) and telemetry enabled by default.
- Multi-region clusters (especially in disaster recovery setups) often see huge costs if network rules or replication policies aren’t tuned properly.
Methods for optimizing network costs
- Minimize cross-zone communication
- Deploy services that communicate frequently in the same AZ using zonal affinity rules and topology spread constraints.
- Use topology aware routing. When a pod in zoneA tries to communicate with serviceX, the request will try to be routed to a pod of serviceX in zoneA, if none is found, it will find a pod in another zone and route to it as a fallback.
- Enable compression
- Use gRPC or compressed HTTP for service-to-service communication. gRPC reduces payload size and is more efficient than traditional REST APIs.
- For existing APIs, enable gzip compression at the application or Ingress level.
- Control service mesh overhead
- If you use a mesh like Istio or Linkerd, audit your sidecar traffic patterns.
- Turn off telemetry, mTLS, or Envoy tracing where not required.
- Consider ambient mesh mode or sidecar-less modes to reduce duplication.
- Avoid unnecessary inter-region traffic
- Don’t replicate data globally unless needed.
- Watch for rogue jobs syncing across regions, or services reaching out to remote endpoints without caching or batching.
- Review ingress & egress behavior
- Use internal load balancers to keep traffic inside the VPC when possible.
- Audit external egress traffic (to SaaS APIs, third-party tools) with a proxy or NetworkPolicy rules to restrict and control it.
Best Tools for Kubernetes Cost Optimization
Below, we compare top Kubernetes cost optimization tools.
Each tool is evaluated based on how well it supports the core strategies above—right-sizing, autoscaling, node optimization, storage visibility, and cost allocation.
1. Zesty
Overview:
Zesty is a Kubernetes resource optimization platform that leverages intelligent automation and a multi-layer optimization approach. It aligns compute and storage resources with real-time demand while maximizing commitment coverage for both cost efficiency and flexibility, helping teams reduce cloud spend, eliminate manual work, and maintain application performance.
Key Features:
- Headroom reduction: Leverage FastScaler™ to automatically adjust the minimum replica count and confidently reduce overprovisioned CPU buffers kept for handling traffic spikes with faster application boot time.
- Pod Rightsizing: Continuously match CPU and RAM to real-time usage, driving down container costs while freeing your team from repetitive, time-consuming optimization.
- PV Autocaling: Automatically scale persistent volumes up or down based on real-time usage. Cut storage costs by 70% while keeping your applications always available.
- Commitment Manager– Automatically cut EC2 costs and stay flexible as your usage changes. Our AI algorithm buys micro-commitments that build a flexible portfolio, maximize savings, avoid lock-in, and ensure long-term optimization without manual intervention.
- Spot protection: Confidently migrate more workloads to Spot Instances and maximize savings. When a Spot termination occurs, automatic node replacement in under 40 seconds keeps your apps running and costs in check.
Pros:
- Enhanced Deployment Speed: The combination of HiberScale and image caching significantly reduces the time required to scale applications, ensuring that resources are available when needed without delay.
- Cost Efficiency: By automating node hibernation and minimizing idle resource consumption, Kompass can achieve up to 70% savings on compute and storage costs.
- Operational Simplification: The platform’s automation reduces the manual effort required for resource management, allowing DevOps teams to focus on strategic initiatives.
Cons:
- Kubernetes-Centric: Kompass is primarily designed for Kubernetes environments, making it less applicable for organizations utilizing other orchestration platforms or traditional virtual machines.
- Learning Curve: Implementing advanced features like HiberScale and image caching may require a period of adaptation and understanding for teams unfamiliar with automated hibernation technologies.
Pricing:
Zesty Kompass operates on a usage-based pricing model:
- Base Monthly Fee: $500
- Per Managed vCPU: $5 per managed vCPU per month
This structure ensures that organizations pay in alignment with their resource utilization, promoting cost efficiency.
2. OpenCost
Overview:
OpenCost is an open-source project that provides real-time cost monitoring and allocation for Kubernetes environments. It offers granular insights into cloud infrastructure and container costs, enabling organizations to achieve cost transparency within their Kubernetes clusters.
Key Features:
- Real-Time Cost Allocation: Offers detailed tracking of cloud infrastructure costs for resources like CPU, GPU, memory, and persistent volumes.
- Granular Cost Breakdown: Provides cost insights at various Kubernetes levels, including clusters, nodes, namespaces, controllers, services, and pods.
- Multi-Cloud Support: Integrates with cloud billing APIs from providers like AWS, Azure, and GCP, as well as on-premises clusters, offering dynamic asset pricing and comprehensive cost transparency.
- Open-Source and Customizable: As a CNCF incubating project, OpenCost is free to use and open to contributions from the community, allowing for customization to fit specific organizational needs.
Pros:
- Cost Transparency: Enhances visibility into Kubernetes spending, aiding in identifying cost drivers and optimization opportunities.
- Community-Driven: Being open-source, it benefits from continuous improvements and support from a broad community of Kubernetes practitioners.
Cons:
- Limited Support: As an open-source project, it may lack the dedicated support and advanced features found in commercial solutions.
- Manual Maintenance: Requires manual setup and ongoing maintenance, which might be resource-intensive for some organizations.
Pricing:
OpenCost is opensource.
3. Loft

Overview:
Loft is a platform designed to optimize Kubernetes multi-tenancy by providing virtual clusters and advanced cost-saving features. It enables organizations to consolidate workloads and reduce infrastructure costs effectively.
Key Features:
- Virtual Kubernetes Clusters: Allows multiple virtual clusters to run on a single physical cluster, promoting resource consolidation and cost savings.
- Automatic Sleep Mode: Identifies idle resources and automatically puts them into a low-cost sleep state, resulting in significant cost reductions.
- Self-Service Provisioning: Offers users the option to provision virtual clusters via various interfaces, enhancing operational efficiency.
Pros:
- Cost Efficiency: By consolidating workloads and managing idle resources, Loft can reduce Kubernetes costs by up to 70%.
- Enhanced Multi-Tenancy: Facilitates better isolation and true multi-tenancy, allowing multiple teams or applications to share the same infrastructure securely.
Cons:
- Complexity in Setup: Implementing virtual clusters and configuring sleep modes may require a learning curve and careful planning.
- Limited to Kubernetes: Primarily focuses on Kubernetes environments, making it less applicable for organizations using other orchestration platforms.
Pricing:
Loft offers a free tier with basic features. For advanced features and enterprise support, pricing details are available upon request from their sales team.
4. Densify
Overview:
Densify is a cloud optimization platform that leverages AI-driven analytics to recommend optimal resource settings for Kubernetes environments, aiming to reduce costs and enhance efficiency.
Key Features:
- AI-Driven Recommendations: Analyzes workload patterns and resource utilization to provide precise recommendations for resource requests and limits.
- Multi-Cloud Support: Supports optimization across various cloud providers, including AWS, Azure, and GCP, offering flexibility for diverse cloud strategies.
- Detailed Reporting: Provides comprehensive insights into resource usage and optimization opportunities, aiding in informed decision-making.
Pros:
- Proactive Optimization: Focuses on configuring workloads efficiently from the start, rather than reacting to changes, leading to sustained cost savings.
- Broad Platform Support: Manages resources across various Kubernetes distributions and cloud platforms, enhancing its applicability.
Cons:
- Integration Complexity: Implementing Densify’s recommendations may require significant changes to existing workflows and configurations.
- Cost Considerations: While it offers cost savings, the platform itself is a paid solution, which may be a factor for budget-conscious organizations.
Pricing:
Densify operates on a subscription-based pricing model. Specific pricing details are provided upon request from their sales team.
5. Yotascale
Overview:
Yotascale is a cloud cost management platform designed to provide comprehensive visibility and optimization recommendations for Kubernetes environments. It offers detailed cost allocation and real-time insights, enabling organizations to manage and reduce their cloud expenditures effectively.
Key Features:
- Granular Cost Allocation: Yotascale allocates Kubernetes costs by namespace, pod, deployment, and label, providing precise insights into resource utilization.
- Automated Recommendations: Utilizes machine learning to offer optimization suggestions, such as rightsizing and identifying idle resources, to reduce costs.
- Multi-Cloud Support: Supports various cloud providers, offering a unified view of costs across different platforms.
- Budgeting and Forecasting: Provides predictive budgeting and forecasting to anticipate future costs and prevent budget overruns.
Pros:
- Enhanced Visibility: Offers end-to-end cost visibility for multi-cloud, containers, and services.
- Proactive Cost Management: Automated recommendations and real-time insights enable proactive management of cloud expenditures.
Cons:
- Integration Complexity: Implementing Yotascale may require integration with existing systems, which could be complex and time-consuming.
- Learning Curve: Users may need time to fully understand and utilize all features effectively.
Pricing:
Yotascale offers customized pricing based on the organization’s specific needs and cloud environment. Interested parties are encouraged to contact Yotascale directly for detailed pricing information.
6. AWS Cost Explorer
Overview:
AWS Cost Explorer is a native AWS tool that enables users to visualize, understand, and manage their AWS costs and usage over time. It provides an intuitive interface for creating custom reports and analyzing cost data.
Key Features:
- Custom Reports: Allows users to create tailored reports to analyze cost and usage data, facilitating detailed insights.
- Cost Forecasting: Provides forecasts based on historical data to predict future AWS spending.
- Granular Data Analysis: Supports filtering and grouping of data by various dimensions, such as service, linked account, and tags.
Pros:
- Integrated with AWS: As a native AWS service, it offers seamless integration with other AWS tools and services.
- User-Friendly Interface: Designed with an intuitive interface, making it accessible for users to navigate and generate reports.
Cons:
- AWS-Centric: Limited to AWS services, lacking support for multi-cloud environments.
- Limited Granularity: While it offers detailed insights, some users may find the granularity insufficient for complex analyses.
Pricing:
- Free Tier: Accessing Cost Explorer through the AWS Management Console is free of charge.
- API Requests: Each paginated API request incurs a charge of $0.01.
- Hourly Granularity Data: Available at a daily charge of $0.00000033 per usage record, translating to approximately $0.01 per 1,000 usage records monthly.
Tools comparison and overview
| Tool | Visibility | Automation | Cost Focus | Best For |
|---|---|---|---|---|
| Zesty Kompass | ✅ | ✅ | 🔥 High | Real-time, AI-driven Kubernetes cost optimization with automated resource management. |
| OpenCost | ✅ | ❌ | Medium | Open-source cost monitoring and allocation within Kubernetes environments. |
| Loft | ✅ | ✅ | High | Multi-tenancy management and resource consolidation through virtual Kubernetes clusters. |
| Densify | ✅ | Limited | High | AI-driven recommendations for rightsizing resources across multi-cloud Kubernetes deployments. |
| Yotascale | ✅ | ✅ | Medium | Comprehensive cost visibility and allocation with automated optimization suggestions. |
| AWS Cost Explorer | ✅ | ❌ | Medium | Native AWS tool for visualizing and managing AWS costs and usage over time. |
Key:
- Visibility: Indicates the tool’s capability to provide insights into cost data.
- Automation: Reflects the level of automated features for cost optimization.
- Cost Focus: Represents the tool’s emphasis on cost-saving functionalities.
- Best For: Describes the primary use case or target audience for the tool.

