
- Most Kubernetes clusters run at 30-40% real utilization, with the rest lost to overprovisioned CPU and memory requests.
- HPA, VPA, and cluster autoscaler each solve a different scaling problem; running only one leaves either cost or performance on the table.
- Zesty’s Multi-Dimensional Autoscaling (MDA) unifies vertical and horizontal scaling so teams don’t have to manually reconcile HPA, VPA, and Karpenter policies against each other.
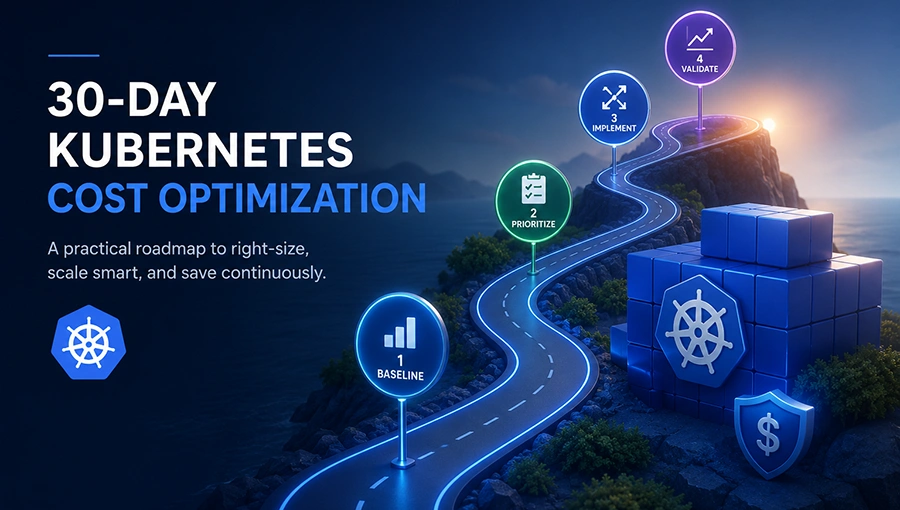
- A phased 30-day rollout: baseline, analyze, automate, validate, catches performance regressions before they hit production.
- Tracking cost-per-pod and cost-per-namespace turns technical efficiency gains into numbers both engineering and FinOps teams can act on.
Kubernetes optimization requires solving two problems at once: cutting the resource waste sitting in oversized pods and nodes, and doing it without introducing the performance regressions that oversizing was originally meant to prevent. Most teams only manage one side of that trade. They run a single rightsizing pass, bank a chunk of savings, and then watch it gradually erode over the following months as new services ship and old assumptions go stale, because they treated Kubernetes cost optimization as a project with an end date instead of an ongoing discipline.
This isn’t another concept primer on why clusters waste resources. It’s a concrete 30-day plan: what to measure in week one, what to fix in week two, what to automate in week three, and how to prove in week four that none of it broke anything. Along the way, it includes a decision matrix for the four tools teams reach for to automate this: HPA (Horizontal Pod Autoscaling), VPA (Vertical Pod Autoscaling), cluster autoscaler, and Karpenter, plus the five pitfalls that gradually undo the gains after the rollout ends.
Why Most Kubernetes Clusters Are Overprovisioned
Kubernetes clusters waste resources because the numbers that determine cost, CPU and memory requests usually get set once, under uncertainty, and then never corrected as real usage data comes in. That single habit is most of what Kubernetes resource optimization actually corrects.
Three patterns explain nearly all of it. Engineers set requests against peak theoretical load rather than observed usage, building in a safety margin that’s rarely adjusted once a service is stable in production. QoS classes, Guaranteed, Burstable, and BestEffort, compound the problem by creating inconsistent eviction risk: teams either overprovision to land safely in a class they don’t strictly need, or under-provision and get surprised by an eviction under node pressure. And manual capacity reviews, run quarterly or annually, simply can’t keep pace with a CI/CD pipeline that ships new workloads and reshapes traffic patterns every week.
- Requests set from theoretical peaks, not observed data, the default is guesswork with a wide safety margin baked in from day one.
- QoS misconfiguration, Guaranteed, Burstable, and BestEffort pods carry different eviction risk, and most clusters land on a mix nobody deliberately chose.
- Manual review cycles that lag CI/CD, by the time a quarterly review catches a misconfigured workload, a dozen new ones have shipped without one.
Each of these patterns is individually easy to fix once it’s identified, but they’re rarely diagnosed on their own, a namespace with theoretical-peak sizing is often also the one running the wrong QoS class, because both trace back to the same root habit: a decision made once at launch and never corrected. That’s what makes manual review cycles the weakest link. A team running quarterly reviews is, at any given moment, working from data that’s already a quarter out of date relative to whatever shipped last sprint.
None of this requires digging into pod resource limits at the YAML level to understand, the fix starts with recognizing which of these three patterns is driving a given cluster’s overprovisioning, which is exactly what the next two sections turn into an actionable plan.
The Kubernetes Autoscaling Decision Matrix: HPA vs VPA vs Cluster Autoscaler vs Karpenter
Kubernetes autoscaling isn’t one decision, it’s three, because HPA, VPA, and cluster autoscaler each scale a different layer of the same cluster, and none of them substitutes for the others. The HPA vs VPA question most teams start with is actually the wrong first question: HPA changes how many copies of a pod are running, VPA changes how big each copy is, and neither one touches whether the cluster has enough nodes to schedule the result. That’s a third tool’s job, traditionally the cluster autoscaler, or increasingly Karpenter as a faster, more flexible node-provisioning alternative.
| Tool | What It Scales | What It Misses | Best For |
| HPA (Horizontal Pod Autoscaler) | Replica count, based on CPU, memory, or custom metrics | Per-pod sizing, it adds copies of a pod that may still be wrongly sized | Stateless workloads with variable traffic where adding replicas absorbs load spikes |
| VPA (Vertical Pod Autoscaler) | CPU and memory requests and limits on existing pods | Replica count and node capacity, a correctly sized pod still needs somewhere to run | Workloads where request accuracy matters more than replica count; run in recommendation mode first |
| Cluster Autoscaler | Node count, based on unschedulable pods | Whether the pods being scheduled are sized correctly in the first place | Clusters on fixed instance types where node-level elasticity is the main gap |
| Karpenter | Node provisioning, with more flexible instance-type selection and bin-packing than cluster autoscaler | Pod-level sizing, still depends on HPA/VPA to get individual pod requests right | Teams wanting faster, more cost-aware node provisioning without managing node groups manually |
Read across the rows and the pattern is clear: these four tools solve replica count, pod size, and node count as three separate problems, which is exactly why teams commonly run several of them together rather than picking just one. The real gap isn’t which tool to choose, it’s that choosing all three still leaves someone responsible for making sure their decisions don’t conflict, since none of these tools was designed with visibility into what the other two are doing.
That coordination gap is also where most rollout mistakes happen. A team that enables HPA and VPA on the same workload without deciding which one leads during a given traffic event, for instance, can end up with both tools reacting to each other’s changes instead of to real demand, a specific failure mode covered in the pitfalls section below.
The 30-Day Kubernetes Optimization Roadmap
What should you actually do, and in what order? Four weekly blocks, baseline, analyze, implement, validate, take a cluster from unmeasured guesswork to validated savings without needing a single day more than a month.
Week 1, Baseline Your Cluster for Kubernetes Optimization
Kubernetes optimization starts with data, not configuration changes. Set a measurement window of 7 to 14 days, long enough to capture a full weekly traffic cycle without stalling the rest of the roadmap, and use it to capture CPU and memory utilization percentiles, not averages, at the pod, node, and cluster level.
- Capture 50th, 90th, 95th, and 99th percentile utilization per workload, since averages hide the spikes that requests actually need to cover
- Record pod restart counts and OOMKilled events as an early signal of undersized limits
- Itemize current spend by namespace so waste is visible by team before anything changes
- Note current node count and instance types as the starting point for Week 3’s node-level decisions
Resist the temptation to start resizing anything in Week 1. A rightsizing decision made before the full measurement window closes is just a faster version of the same guesswork that caused the overprovisioning in the first place, the entire value of this week is replacing assumptions with a dataset the rest of the roadmap can be measured against.
Week 2, Analyze for the Highest-Impact Fixes
Where does the baseline data point first? Toward the namespaces and workloads with the widest gap between requested and actual usage, that gap is where the recoverable spend is concentrated, and chasing smaller gaps first wastes the limited time in this roadmap.
- Rank namespaces by the dollar gap between requested and 95th-percentile actual usage, not by raw utilization percentage
- Flag oversized container images and slow-starting pods specifically, both force teams to overprovision replicas or resources just to compensate for slow scale-up
- Separate real overprovisioning from workloads intentionally running at low utilization for latency-sensitive reasons, so fixes don’t disrupt something that was deliberate
- Shortlist the top three to five namespaces for Week 3, rather than attempting a cluster-wide rewrite in two weeks
This is a triage exercise, not a comprehensive audit. The goal is a short, ranked list that Week 3 can act on immediately, not a spreadsheet documenting every inefficiency in the cluster, most of which won’t move the cost number enough to justify the engineering time.
Week 3, Implement Autoscaling With a Conservative Rollout
Kubernetes rightsizing at this stage means automating the fixes Week 2 identified, in a sequence that limits blast radius if something goes wrong. Start with VPA in recommendation-only mode, comparing its suggestions against the Week 1 baseline before it ever touches a running pod spec. Once those recommendations are validated, layer in HPA with conservative thresholds on the shortlisted workloads. Only then bring in cluster autoscaler or Karpenter for node-level elasticity, once pod-level scaling is stable enough that node scaling isn’t reacting to pod-level mistakes.
- Run VPA in recommendation mode for at least a week before enabling automatic updates
- Set HPA thresholds conservatively at first, then tighten them as confidence builds
- Bring in cluster autoscaler or Karpenter last, so node scaling reacts to accurate pod sizing rather than compensating for it
- Document the rollout order so the next engineer who inherits the cluster understands why three tools are layered instead of one
Some teams skip the manual sequencing entirely by using Zesty’s Multi-Dimensional Autoscaling (MDA), which coordinates horizontal and vertical scaling automatically instead of layering HPA, VPA, and Karpenter policies by hand.
Week 4, Validate and Set Up Continuous Optimization
How do you know Weeks 1 through 3 actually worked? Load test the workloads that were resized or had autoscaling enabled, watch for OOMKilled, FailedScheduling, and Evicted events, and compare cost-per-pod before and after against the Week 1 baseline, not against a general industry benchmark.
- Load test shortlisted workloads under the same traffic pattern the Week 1 baseline captured, not just average conditions
- Compare cost-per-pod and cost-per-namespace directly against Week 1 figures, in dollars, not just utilization percentage
- Confirm no increase in eviction or scheduling-failure events versus the baseline period
- Set up a recurring review cadence, this is the step that turns a 30-day project into continuous optimization instead of a rollout that gradually decays over the next quarter
The review cadence is the part teams most often skip once the pressure to show savings is off. Put it on a calendar before day 30 ends, not after, since the same CI/CD velocity that created the original overprovisioning will start drifting the new baseline out of date within a single quarter.
Five Pitfalls That Undo Optimization Gains
Why do rightsizing gains disappear a few months after the rollout? Almost always one of five recurring mistakes, each of which erodes savings gradually enough that nobody notices until the next cost review.
- HPA and VPA Fighting Over the Same Metric. When both tools scale off CPU utilization independently, they can trigger conflicting actions, VPA resizing a pod while HPA simultaneously adds replicas in response to that same resize. Fix: assign each tool a distinct signal, or stagger which one leads during any given change window.
- Resource Fragmentation From Ignored Bin-Packing. Pods spread thin across many half-empty nodes because nobody is consolidating placement, so the cluster pays for node capacity nothing is using. Fix: actively manage bin-packing, not just pod sizing; Zesty’s Adaptive Pod Placement (APP) handles bin-packing continuously, consolidating workloads so clusters don’t steadily bleed capacity across half-empty nodes.
- CPU Throttling From Limits Set Too Close to Requests. Setting limits with little headroom above requests causes pods to get throttled the moment usage ticks above baseline, which shows up as latency, not as an obvious cost problem. Fix: leave deliberate headroom between requests and limits for bursty workloads, informed by the percentile data from Week 1.
- Treating Optimization as a One-Time Project. A rollout that ends at day 30 starts decaying the moment new services ship without going through the same baseline-and-fix process. Fix: keep the Week 4 review cadence running on a fixed schedule, not as a one-off.
- Optimizing Compute While Ignoring Storage. Persistent volume sizing rarely gets the same scrutiny as CPU and memory, so oversized PVs carry their own version of the same waste without drawing attention. Fix: extend the baseline-and-rightsize process to storage, not just compute.
Any one of these five showing up is a reason to reexamine the specific week that introduced it, not to declare the whole rollout a failure, pitfalls 1 and 3 usually trace back to Week 3’s rollout order, while 2, 4, and 5 tend to surface during Week 4 validation if the review cadence is actually being followed.
Conclusion: Automate the Roadmap With Zesty
The 30-day plan above works, but it isn’t a one-time fix, it’s a cycle. Workloads keep shipping through CI/CD, traffic patterns keep shifting, and the baseline that was accurate in week one starts drifting the moment week five begins. Quarterly manual reviews, run at the pace most teams can sustain by hand, simply can’t keep up with that rate of change, which is why the same clusters tend to need the same rightsizing pass repeated every few months, the five pitfalls above aren’t hypothetical; they’re what a lapsed review cadence actually looks like.
That repetition is the actual cost of doing this manually: not just the initial 30 days, but another 30 days every quarter, plus whatever savings gradually erode in between while nobody is watching. Multiply that across every engineer who has to relearn why HPA, VPA, and cluster autoscaler are tuned the way they are each time the cluster changes hands, and the manual version of this roadmap costs a lot more than the month it takes to run once.
Zesty is built to run this exact roadmap on autopilot instead. Its Multi-Dimensional Autoscaling (MDA) unifies horizontal and vertical scaling into one continuous layer rather than two separately tuned tools, while its Adaptive Pod Placement (APP) handles bin-packing on an ongoing basis instead of as a periodic cleanup, keeping rightsizing current as workloads change instead of waiting for the next scheduled review to catch up.
Teams automating rightsizing and bin-packing this way typically see 50-80% lower compute costs than manual, quarterly-review-based Kubernetes cost optimization, without re-running Weeks 1 through 4 every time workloads change.
Book a demo with Zesty and turn this roadmap from a 30-day project into something that runs continuously in the background.
Automated rightsizing and bin-packing typically cut Kubernetes compute costs by 50-80% versus the manual, quarterly rebaseline this roadmap replaces.
FAQs
What's the difference between HPA, VPA, cluster autoscaler, and Karpenter?
HPA scales replica count, VPA scales CPU and memory requests/limits on existing pods, and cluster autoscaler (or Karpenter, its faster and more flexible alternative) scales node count. They solve replica count, pod-level sizing, and node count as three separate problems, which is why teams commonly run several of them together instead of picking just one, and why someone still has to make sure their decisions don’t conflict.
How long does a Kubernetes optimization rollout take?
30 days, broken into four weekly blocks: Week 1 baselines the cluster, Week 2 analyzes the data for the highest-impact fixes, Week 3 implements autoscaling with a conservative rollout order, and Week 4 validates the results and sets up a recurring review cadence.
Why do most Kubernetes clusters run at only 30-40% real utilization?
Because resource requests get set once, against theoretical peak load rather than observed usage, and never get corrected. Manual capacity reviews, run quarterly or annually, can’t keep pace with a CI/CD pipeline that ships new workloads and reshapes traffic patterns every week, so the gap between requested and actual usage keeps growing.
What are the most common mistakes that undo Kubernetes cost savings?
Five recurring pitfalls erode savings after the initial rollout: HPA and VPA fighting over the same metric, ignored bin-packing that fragments capacity across half-empty nodes, resource limits set too close to requests causing CPU throttling, treating optimization as a one-time project instead of a continuous one, and optimizing compute while ignoring storage and PV sizing.
Do I have to manually coordinate HPA, VPA, and Karpenter myself?
Not necessarily. Running all three by hand is the default, but it means someone has to keep their decisions from conflicting as workloads change. Zesty’s Multi-Dimensional Autoscaling (MDA) unifies the horizontal and vertical scaling decisions into one continuous layer, so the coordination this roadmap describes happens automatically instead of needing a person to reconcile three separate tools.